Spoon Rack Advent Calendar With Faux Silver Spoons

23 comments
Spoon Rack Advent Calendar With Faux Silver Spoons
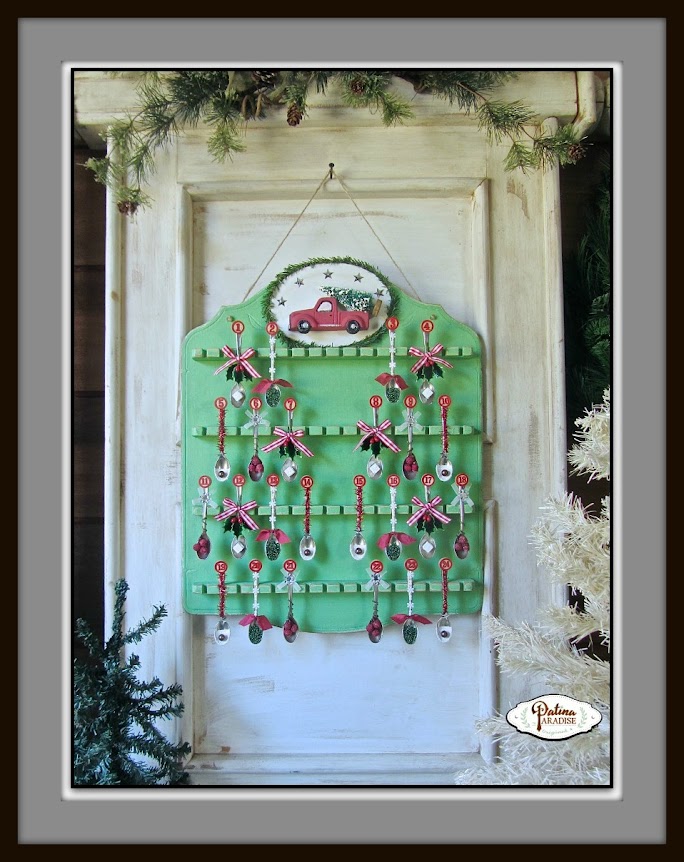
After years of wanting to create a one of a kind Advent Calendar for my munchkin I am so happy to finally have one ahead of the season. When I spotted two of these spoon racks at the thrift store a few years ago I knew that I could transform them into something. Then I discovered small silver spoons at the dollar store and the idea of using the two together was born.  To finish it just as I had envisioned, I had the pleasure of using one of my favorite paints: "Black Dog Salvage Furniture Paint" and other Woodcraft products...

What you will need for this project...

* I was compensated with product in order to create this project. (This is a sponsored post but all opinions are 100% my own).


Steps...

1) Lightly sand your spoon rack and wipe clean. You can use wood filler to fill in the engraved pattern. Since I knew that I was going to cover it with something, I didn't bother with this step.
2) Mix together 50% "Go Green", 40% "Clean Canvas" and 10% "Patino Greenio" to get a vintage green color.
Brush on 2 coats of paint waiting an hour in between coats. Lightly sand edges where natural wear would occur. 
3)
Decide on a topper for your advent calendar and add it on. Use wire or jute to hang it with.


For my topper I used a shiny plastic ornament that I found at Walmart. (Unfortunately I forgot to take a before shot and they no longer had any in stock). My hubby cut it in half lengthwise so that it would lay flat. Since I love patina, I painted over the shiny red with some Black Dog Salvage Furniture Paint in "I need a Bandage" red to give it an older look.  Behind the truck is a thin wood oval plaque also found at Walmart.  I painted it with "Clean Canvas" white and added some faux greenery to the edge and some silver stars for added interest. The vintage bottle brush tree was from my stash. I used hot glue to adhere everything together.


What you will need for the spoons and to add to the rack...
  • "Dollar Tree" silver mini plastic spoons from the wedding section (24 pk)
  • Black Dog Salvage "Guard Dog Topcoat" (for antiquing the spoons)
  • General Finishes "Van Dyke Brown" Glaze Effects (for antiquing the spoons)
  • Miniature clothespins for the back of the spoons (1" x 1/4" x 1/8")
  • Various ribbons and berries and beads
  • Tim Holz Ideology Game Pieces (for numbers)
  • Plastic truck ornament and bottle brush tree (optional) 
  • Hot glue and hot glue gun 

    To antique the spoons you will need a teaspoon of General Finishes Van Dyke Brown Glaze and a teaspoon of Guard Dog Top Coat. (I discovered that they both need to be done together otherwise the glaze wipes off when you go to brush on a topcoat or when you handle it with your fingers). You can can create the finish of your choice, B, C, or D by following the instructions below...

    A) Using hot glue attach the mini clothespins to the back of the spoons about 3/4 of an inch down from the top with the open end facing down. This will help the spoons rest higher on the spoon rack and give you a way to hang the ornaments on the tree. Gluing it on before adding the glaze gives the hot glue a better chance to bond the two together.  B) Using a soft rounded end brush and holding the end of the spoon handle with your fingers, brush a thin coat of the glaze mixture onto the spoons. You need very little on the brush so if it is too much, blot the excess onto a piece of paper towel. Then brush it onto the spoon. Try to avoid brush marks from excess.  C) If you want to add more antiquing let the spoons dry for about an hour, then brush on a second coat.  D) If you want them to look authentically old and tarnished you can continue by adding some brown spots to the spoons. I did this by loading the brush with the mix and using the wood end of another brush to splatter a fine mist of the glaze onto the spoons. At this point I think they look pretty realistic don't you?

    * You will note that the tip of the spoon has no antiquing glaze since I knew that I would be adding wooden numbers there and it also gave me something to hold on to while antiquing them.

      
    These are the 4 designs that I ended up with and repeated. Since the bows take up so much space, I made sure to vary their position and size. Most of the supplies were brought from Hobby Lobby and Walmart. Here's what you will need for each one...

    1. Gingham ribbon, holly berry pick and faux sugar cube (see directions below)
    2. Mini snowflake garland, red seam binding, green seed beads glued in place with mod podge
    3. Berry pick, white semitransparent ribbon and silver snowflake
    4. Red tinsel ribbon, silver star, white paint and glitter, shiny brown bead 

    To make your own sugar cubes take your 3/8 of an inch wooden cubes and use the white "Clean Canvas" to paint 5 of their sides then immediately roll in some glitter. (The unpainted side will be the one you glue onto the spoon). Let them dry and use hot glue to adhere them in place.

    Once you are happy with the placement of the different designs, add your wooden numbers. You can purchase them HERE.  Other options for numbers: print your own on thick card stock and cut them out or buy tiny tags and write down the numbers on them.

    When putting the spoons on the rack make sure to gently place them in the slots down to the point where the clothespin slides in snug.

    Since the bows add width to the spoons, use every other spot to place your spoons on and stagger the position of those underneath. I personally like symmetry, so I made sure that the left side and the right side mirrored each other in the placement of the 4 different designs.

    On December 1st your munchkin or munchkins can begin hanging an ornament a day on a tree of their choice. I think the spoon ornaments would look great on a small Christmas tree in the kitchen.

    I also painted one of the spoon racks in an off white created by mixing Black Dog Salvage Furniture Paint in  equal parts of "Clean Canvas" and "Dog Bone". The star with the bird is a Christmas ornament also found at Walmart. I think I will make some shabby chic spoon designs to go with it, although I think the same 4 designs look great on it. Which one is your favorite, the green or antique white?


    The next time you spot one of these spoon racks, don't let it pass you by and perhaps consider turning it into an advent calendar for your munchkins.


    Blessings, 


    Lucy


    Rustic Pallet Wood Cabin Ornament

    6 comments
    Rustic Pallet Wood Cabin Ornament

    Christmas has been on my mind lately since it's my favourite time of year. And I have been busy crafting for it. Today a few of my fellow bloggers and I who like to repurpose will be sharing with you some projects made with "junk" to turn into Christmas Ornaments and decor. Another of my favourite things are miniature buildings. (This is my way to be an architect ;o)) Last week I shared a barn ornament and today I am adding to my mini building ornaments by sharing with you how to create a simple log cabin.


    DIY Americana Topiaries And Vignette Using Flea Market Junk

    11 comments
    DIY Americana Topiaries And Vignette Using Flea Market Junk
    It's time for another Junk Revision Challenge. This month's challenge is "PATRIOTIC" and since I married an American and am living in the US, I am finally able to decorate with red, white and blue which are my favourite colors. So the challenge was to come up with a project using so called "junk" and God knows I have plenty of that...

    Painted Wood Mason Jar Door Hanger

    22 comments
    Painted Wood Mason Jar Door Hanger
    I'm so happy to be joining a group of talented ladies for a monthly Silhouette Challenge. I love mason jar projects and after living in "The South" for more than 5 years, I wanted to make something that reflected the Southern charm and manners typical of Southerners. What better than a door hanger in the shape of a mason jar to welcome guests with...

    Coastal Light Fixture With Faux Verdigris

    11 comments
    Coastal Light Fixture With Faux Verdigris
    I love coastal decor and when I was given the opportunity to use Modern Masters verdigris finish I was excited to figure out what project to use it on. I had picked up this plain fixture at the flea market and knew that a little verdigris finish would help give it that beach house look...

    Vintage Style Painted Burlap Birthday Banner

    8 comments
    Vintage Style Painted Burlap Birthday Banner
    It's the last Thursday of the month which means it's time for another "Project Challenge". This month the item up for challenge is "BURLAP OR TICKING".  Since I have been so busy this month, I was caught off guard but then remembered some burlap banners that I had made for a craft show.  I think they would look cute in a photo shoot...

    Rustic Spring Wreath With Vintage Bottles

    25 comments
    Rustic Spring Wreath With Vintage Bottles
    Oh I am so excited at the thought of Spring arriving and have been daydreaming about gorgeous gardens and outdoor projects. And I am so happy to share my latest inspiration for Spring decor with you today along with a whole bunch of other talented bloggers with a blog hop... not bunny hop... although you may see some bunnies on this blog hop!...

    Faux Enamel and Verdigris Clock Face

    14 comments
    Faux Enamel and Verdigris Clock Face
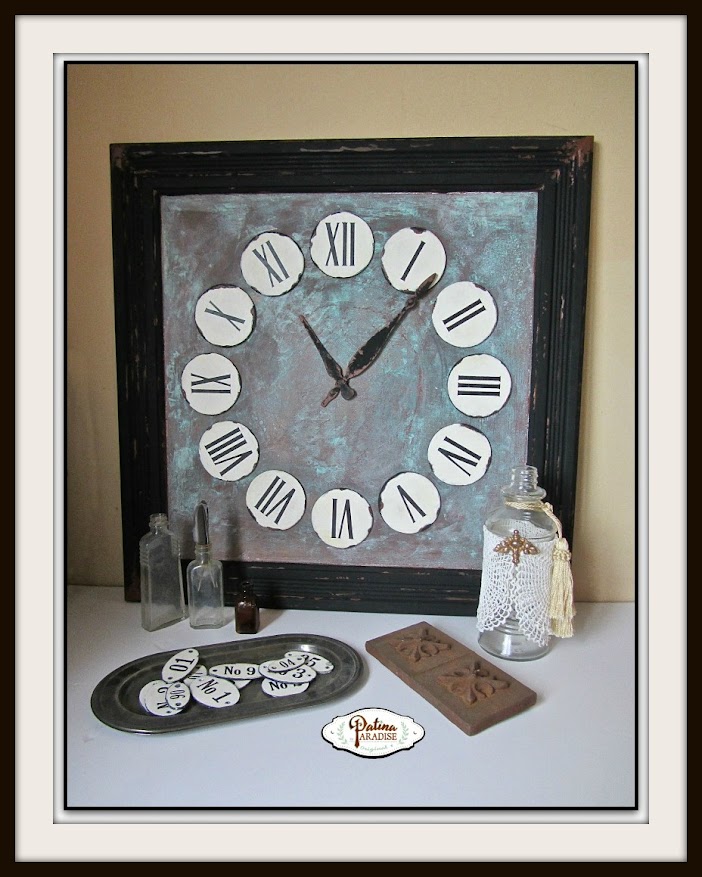
    Can you believe that February is almost over! I can't but this means that it's time for another "Project Challenge". This month the item up for challenge is "CLOCK FACES".  I have a slight obsession with clocks especially since finishing my first one for the Farragoz online class. For this challenge I chose to make a clock face that had been in my mind as an idea for quite a while... so glad that it is now another finished project to cross off my list...

    Bathroom Organization Using Repurposed Items

    15 comments
    Bathroom Organization Using Repurposed Items
    It's time for another Junk Revision Challenge. A monthly blog hop where we transform so called "junk" into something better. I love a good repurpose don't you! This month the challenge was to come up with repurposed "ORGANIZATION" ideas. Come and check out what we each came up with and you may just be inspired! ...

    Top Posts of 2015

    9 comments
    Top Posts of 2015
    The end of the year is near and as I look back on my life as a blogger, I am still stumped at what makes a post go viral, and just before publishing each post, I question whether or not anyone will like, or even see that post/project. But obviously some projects have been more popular than others and I thought it would be nice to try and understand what my readers like and perhaps might want to see next year... so I've put together a link of my 10 top posts... in the hopes of continuing to inspire you next year...

    Cupboard Door Turned Clock with Patina

    13 comments
    Cupboard Door Turned Clock with Patina
    Hope you had a wonderful and blessed Christmas! It's time for "Project Challenge" once again. This month the item up for challenge to use was "Old Books or Sheet Music".  I love the patina that old books have and love using them in diy projects every chance I get. Come see what myself and the others in the group have come up with and I'm sure you will be inspired...

    Oatmeal Container & Old Hymnal Repurpose

    28 comments
    Oatmeal Container & Old Hymnal Repurpose
    It's time for another Junk Revision Challenge. A monthly blog hop where we transform so called "junk" into something better. I love a good repurpose don't you! This month the challenge was to come up with repurposed "GIFT WRAP and CONTAINER" ideas. Come and check out what we each came up with and you may just be inspired! ...

    Rustic Pallet Wood Church Ornaments

    27 comments
    Rustic Pallet Wood Church Ornaments
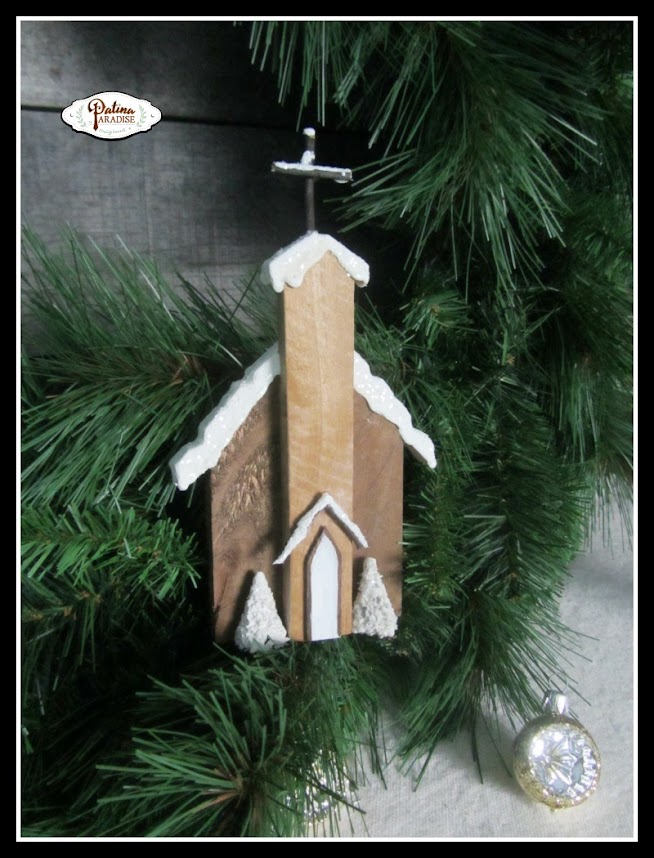
    With Advent here, and Christmas only a few weeks away, my favourite time of year is in full swing. I am happy to share with you a simple and rustic ornament that is relatively easy to make and costs next to nothing...

    Simple Trees from Bead Board and Chicken Wire

    19 comments
    Simple Trees from Bead Board and Chicken Wire
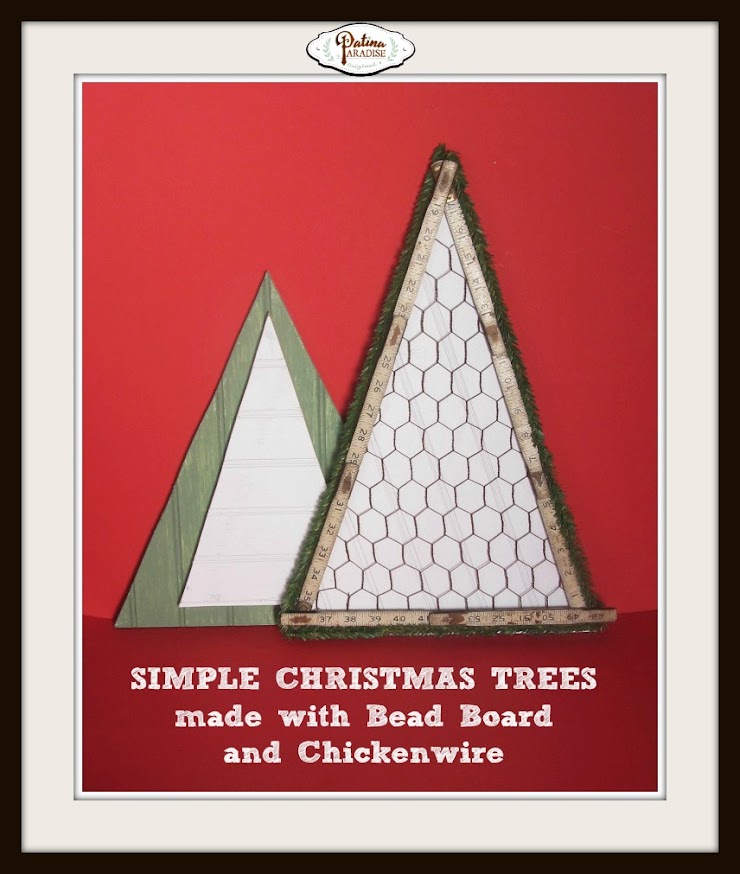
    Hope you had a wonderful and blessed Thanksgiving! It's time for "Project Challenge" once again. This month the item up for challenge was "Bead Board". I had never used it for a project... but now I am enamoured with the stuff. It's so versatile and I love the cottage vibe that it gives off. Come see what myself and the others in the group have come up with for Christmas...

    DIY Christmas Ornament Blog Hop

    9 comments
    DIY Christmas Ornament Blog Hop
    I know Thanksgiving isn't here yet, but for those wanting to get a head start on Christmas, and needing a little inspiration for making your own ornaments, a few bloggers and I have gotten together our creative ideas for some...

    Updating a Frame with Duck Tape

    13 comments
    Updating a Frame with Duck Tape
    This is the second month that I am participating in "Project Challenge". Each month our small group of bloggers will have to come up with an item that fits the theme. This month the item to use was "Duck Tape" or "HVAC Tape". My first challenge was to find duct tape that I liked and then to come up with a project for it...

    Fall Mason Jars with Natural Decor

    22 comments
    Fall Mason Jars with Natural Decor
    I love a mason jar project, don't you, and so when I heard about a blog hop with my favourite bloggers on Hometalk, I couldn't wait to come up with an idea for Fall… I don't know about you but Autumn is my favourite season… and five years ago this Thanksgiving I came upon these and had to save them cause they were too unique not to...

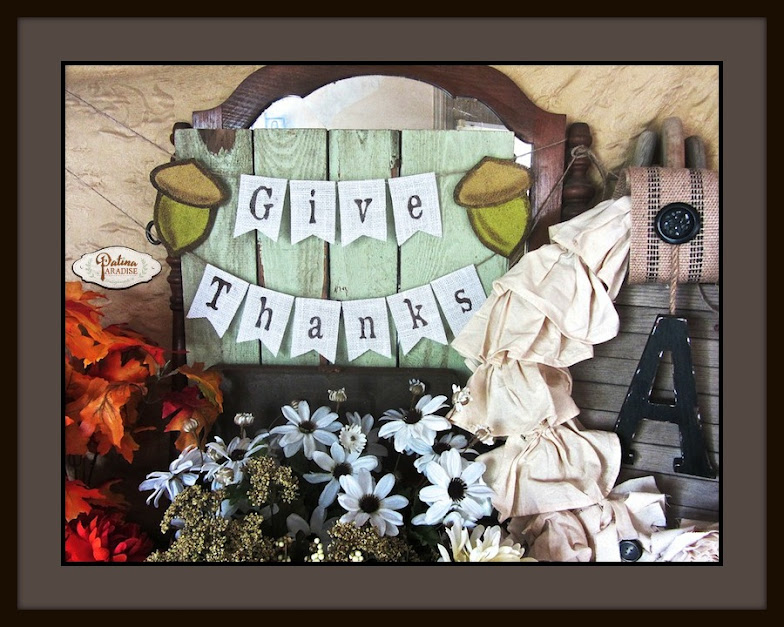
    Give Thanks Mini Burlap Banner

    6 comments
    Give Thanks Mini Burlap Banner
    I have been wanting to create a burlap GIVE THANKS banner for Fall and Thanksgiving for a while now, and knew exactly what I was going to use to make it. Now to decide what shape and what colour… so many possibilities…

    Rusty Wire Wrapped Bottle Pumpkins

    10 comments
    Rusty Wire Wrapped Bottle Pumpkins
    I'm so excited to be participating in a new monthly blog hop called "Project Challenge". Each month our small group of bloggers will have to come up with an item that fits the theme. When I saw that this month's theme was "RUSTY", I felt right at home. Anything rusty, chippy or weathered makes my heart go pitter patter. So I challenged myself to come up with a unique project that fit the bill...

    DIY Home Address Plaque

    19 comments
    DIY Home Address Plaque
    Time again for another Silhouette Challenge and this month the theme is Outdoors and Green… well let's see what I came up with this time...